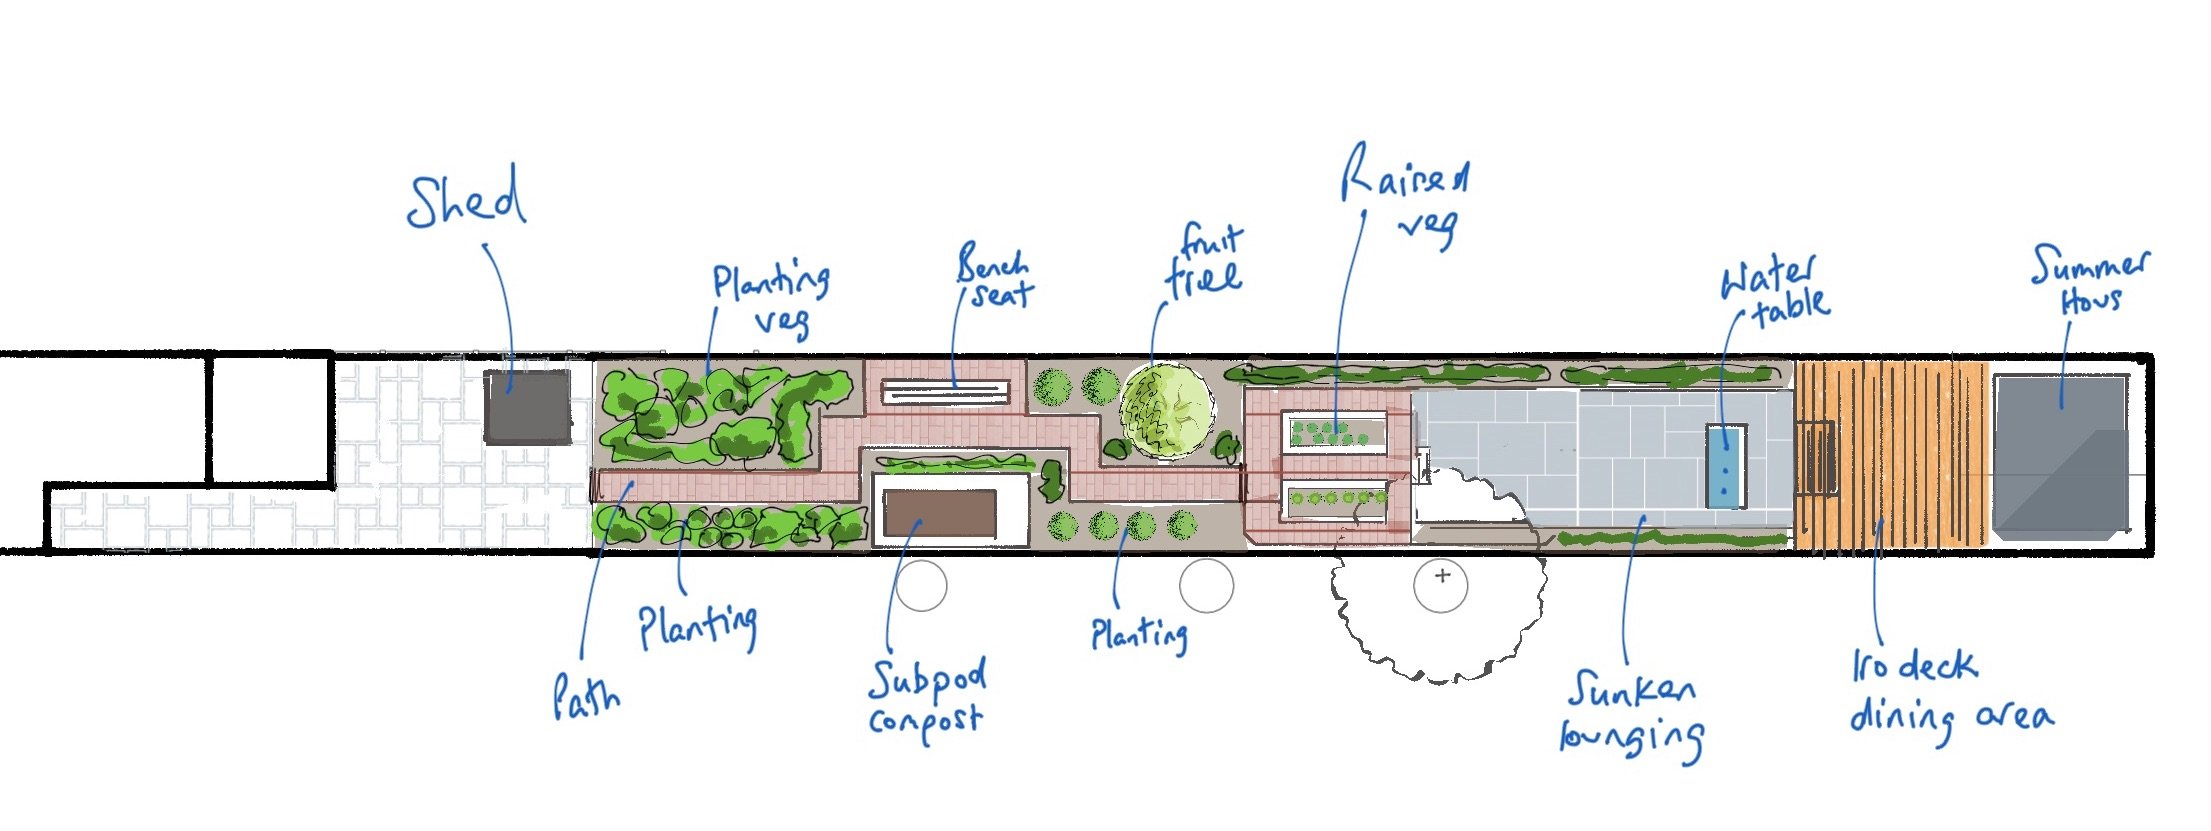
Read more about the Garden Design Lite package here.
What you need to do after purchasing the package
Complete the Client Brief
After you have checked out you will be sent a link to a form for submitting your client brief questionnaire as well as upload your photos and measurements.
Read on to to see some tips on how to measure your garden and what to record.
How to measure a garden
Make a rough ‘bird’s eye’ sketch of your garden – you can achieve best results by drawing what you see from an upstairs window in your house. If this isn’t possible, don’t worry, it’s only a rough sketch and doesn’t even need to be to scale.
Be sure to include all the main features in your garden:
House
Boundaries (walls/hedge/fence)
Gate
Flowerbeds
Ponds/water feature
Swimming pool
Patios/paving
Paths
Steps
Trees/shrubs
Lawn
Outbuildings/garage/shed
Drawing your plan on a large sketch pad leaves plenty of room for making notes – notes about the features you plan to keep or items/plants in need of repair or maintenance as you view your garden from this critical perspective.
Gardens of regular shape
If your garden is rectangular/square and flat measure along each side of the plot and make a note of the measurements on your rough sketch.
As above measure any large structures in your garden, such as the house or outbuildings, and make a note of their measurements on the sketch.
Next measure how far they sit from your boundary by measuring from the wall of the structure to the boundary at right angles (90°) – this is also known as ‘off-setting’.
Top Tip: if your garden is bounded by fence panels measure the width of one panel, count the total number of panels then add them together.
Gardens of irregular shape
For curved gardens or gardens with irregular features in them, such as a tree or curved fence, you need to create a ‘baseline’ to take your measurements from.
Select a straight line in your graden, for example, a boundary fence or a house wall, and mark it on your sketch. This baseline will act as the starting point for all your measurements.
Measure the distance between the baseline and the irregular features in your garden at right angles (90°) to the baseline – if the features are large/wide you should take several measurements at intevals.
All large features should be measured in this way. Smaller features, such as drains or plantpots, can be ignored if you wish as long as they have been noted on your rough sketch.
For irregularly shaped features, like a pond or freeform lawn, measure a rectangle around it and mark this on your sketch. Measure out from the rectangle to your baseline to establish its position in the garden.
Using triangulation
If you have a feature which is proving tricky to measure from the baseline you can use the ‘triangulation’ method instead. This is not as scary as it sounds! Triangulation means measuring the feature from two fixed points - two corners of the house are ideal as shown in the diagram below.
Angled boundaries should be measured using the triangulation method in reverse. That is, measure from either end of the angled boundary to one fixed point on the house.
Credit: www.thetapestore.co.uk
How to work out levels in a garden
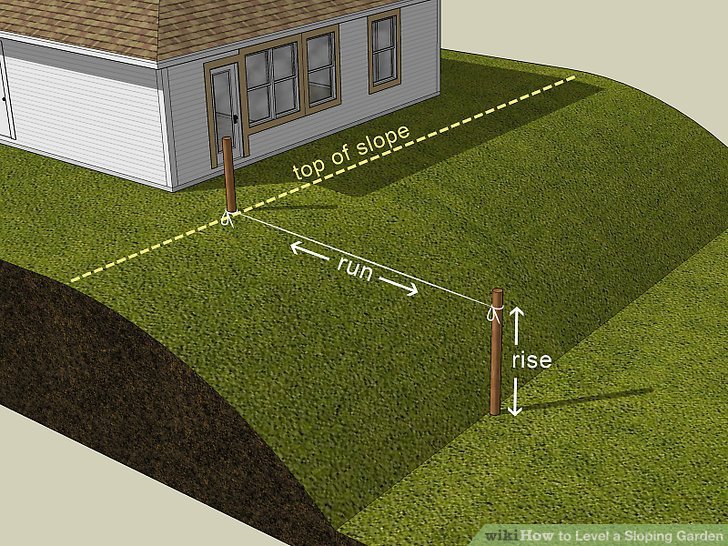
Measure the rise and run of your garden. Determine the vertical distance of your garden from the top to the bottom of the slope (the rise), as well as its horizontal distance (the run), by using a wooden stake into the ground at the top of the slope and a second stake at the bottom. Tie a string around the first stake at ground level, pull it taut, and tie it to the second stake in a place where the string is completely level. The length of the string is the run of your garden and the distance between the string’s location on the second stake and the ground is the rise.
Place a line level in the middle of the string once you’ve tied it to the second stake to ensure that it’s level. Move the string up and down on the second stake until you’ve made it completely level to make sure you’re correctly measuring your garden’s rise and run.
Garden Design Lite Terms and Conditions
All measurements and dimensions are the responsibility of the client and the designer can only design using the information provided. The designer will endeavor to design with construction in mind, but cannot be held responsible for errors provided or subsequently found on site.
The 2 concepts are final and there are no changes included in the initial package.
The concepts are not to scale unless indicated and will not include all measurements and therefore should not be used to construct from without consulting with a landscaper.
The product does not include a full planting plan, just suggestions based on the conditions described in the brief and through online sub soil research by the designer.
The product does not include a lighting plan.
Once the garden designs have been paid for and the product received there are no refunds offered.
On receipt of the completed client brief form and uploaded photos and measurements, the first zoom session meeting must be booked in within 7 days of purchase. Start dates for design are subject to availability and demand at the time of purchase. Immediate start cannot be guaranteed.
The 72 hour turnaround starts from the end of the first zoom call. This is a target which we will strive for but is subject to change if there are circumstances that prevent it but you will be informed if this occurs.
Only for garden sizes up to 100sqm. Other sizes please enquire as to cost.


